Sprinkled Chocolate Spoons

20130109-081600.jpg

I love how certain desserts can make me feel like a kid again. Cupcakes and anything with sprinkles always takes me back to my childhood. Over the weekend I decided it was time to revisit my youth and made chocolate spoons with rainbow, pearl, and peppermint sprinkles. It’s simple to make these dessert spoons, and always a hit at parties with coffee, tea or alone. Here is a step by step tutorial:

What you need: Sprinkles of your choice, or any little candies such as nerds, jelly beans, or chopped candy bars. 1 Bag of milk chocolate chips, spoons and paper plates.

1. Place the chocolate chips in a bowl and heat for 90 seconds.20130109-081654.jpg

2. Place spoons on paper plate so they are leveled and pour chocolate onto the spoon.20130109-081646.jpg

20130109-081637.jpg

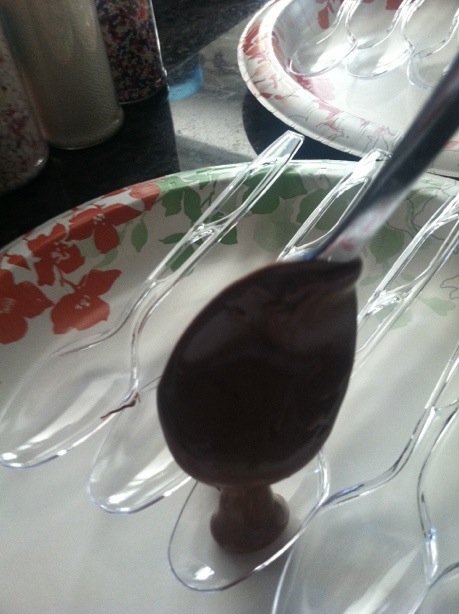
3. Add candy of your choice to melted chocolate on the spoons20130109-081618.jpg

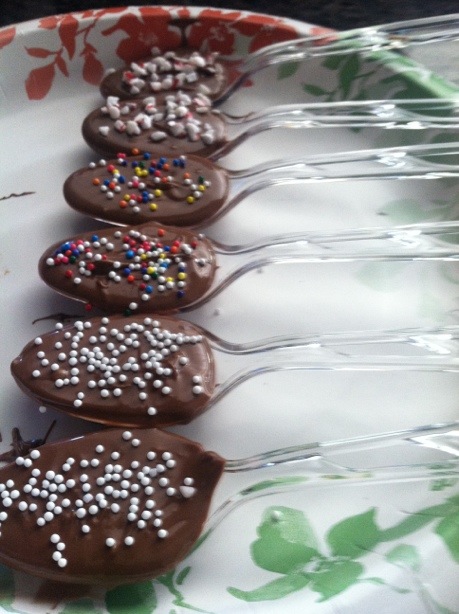
4. Place in the refrigerator for 15 minutes to harden chocolate20130109-081609.jpg

Bar Hosting


20130102-084214.jpg

One of my New Year’s resolution is to host more events for friends and family. A big hit is hosting a Bloody Mary and Mimosa bar! Displaying all the ingredients in a tray with toothpicks for self-service makes it easy for people to make their own drinks and keeps the mess to a minimum. Here are some great tips for building your own bar. I purchased the Altuzarra Neiman Marcus for Target tray, shaker and cups to get my bar looking fancy!

20130102-084205.jpg20130102-084155.jpg

DIY: Spray Painting

I have been looking for an iron bodied mannequin for months, so when I stumbled upon one at HomeGoods I was elated! This mannequin was everything that I was looking for except that it was hot pink. I am obsessed with gold so I purchased spray paint for less than $7, and thought this would make the perfect accent piece for my studio. This DIY is very simple, and even someone like me with no artistic ability couldn’t mess this up.

Step #1. Place Item you are painting in a well ventilated area on a large trash bag or disposable table-cloth.20121227-114941.jpg

Step #2. Shake the spray can, and hold approximately 8″ away from object and spray evenly.20121227-114957.jpgStep #3. Allow object to dry for a few hours and repeat until object is completely coated20121227-115005.jpg

Digital Inspiration

These days everyone is so attached to their phones, iPads, and laptops. It’s so much easier to organize ideas electronically than carrying around a notebook which is probably why everyone is obsessed with online media sites like Pintrest and Instagram. I am no different! When looking for wardrobe inspiration there are only a few magazines that I will read, but I always turn to my favorite digital media sites when I need my daily fashion fix.

1. WhoWhatWear.Com

For celebrity fashion and trends

2. CupcakesandCashmere.com

For outfit, home  decorating, and party planning tips

3. Refinery29.com

For new local restaurants, shops, and events

4. RackedLa.com

For local sales and new up and coming designers

DIY: Luggage Tags

As I began to prepare for my vacation I wrote a to-do list which has been growing by the day. One item that was on the list was luggage tags and I thought of adding a personal touch and creating my own. It’s so simple! I began by creating my own template in Word and printing it on orange card stock. Follow these simple instructions to make your own luggage tags:

20120813-170929.jpgStep 1: Create a template from Word with your information on it, and any design you like. Print your template on colored card stock and cut out each tag.

20120813-171039.jpg

Step 2: Place tags at least 1 inch apart in laminating sheet leaving enough space for cutting. Once the lamination machine is hot, run the laminating sheet through and let the tags cool for 3 minutes before cutting.

20120813-171142.jpgStep 3: Use squiggle scissors to cut the excess laminating sheet, and place one hole punch in the center of the tag.

20120813-171342.jpg

Step 4: Weave long ribbon through hole punched tag and tie in bow through the handle.